
We needed a rectangular-shaped shower curtain rod to hang above our claw foot tub to make it usable as a shower. These curtain rods can be very expensive, so Josh decided to custom build ours using copper pipes. The result is both functional and attractive.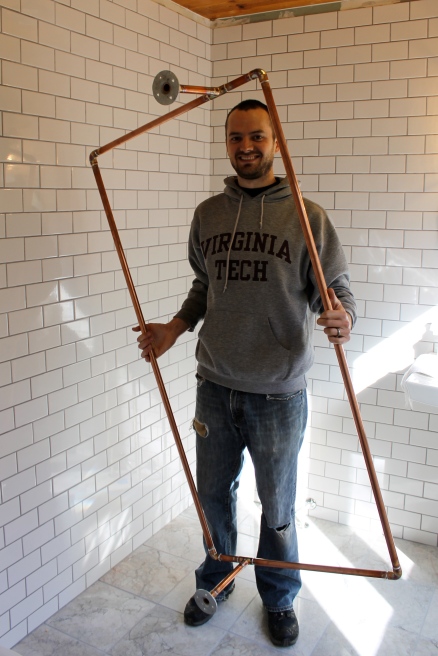 To get started, Josh noted the measurements needed to fit our claw foot tub. Most standard curtain rods for free-standing tubs are smaller, but we wanted to maintain the large space the tub offers. He drew a few sketches, made a materials list, and then picked up supplies at the hardware store.
Materials and Tools:
- copper pipes
- copper elbow joints and t-joints
- pipe cutter
- fitting brush
- flux
- solder
- propane welding torch
- metal mounts and screws
Here’s a quick overview of the process:
Cut the pipes to the required lengths using a pipe cutter. Next, prepare the interior of the pipe by cleaning it with a fitting brush.

Then coat the surfaces you’re going to solder with flux paste. This creates a temporary adhesion until the soldering process creates a stronger bond, and it also pulls the solder into the joint as it’s heated onto the pipe.
 After you connect the two pieces of copper, apply heat with a torch and slowly melt solder along the joint – it will liquify and fill into the seam.
 Let cool, and there you go! I think the color of the soldered copper is beautiful with the copper, gold, and silver variations.
 To make the curtain rod, continue to connect all the pieces through the soldering method using elbow joints and t-joints. Make sure to level the arms before soldering the last two joints to ensure sure it hangs correctly (as seen in the photo above with metal mounts).

Once the entire rod is soldered and cool, it can be installed.

We are excited to see how the copper ages – a patina may develop from oxidation and moisture, so that could look neat!
Stay tuned for our reveal of the entire completed bathroom renovation.


This looks awesome! Good job Josh!!
Impressive! I can’t wait to see the final result this weekend!
Pingback: Bathroom Renovations are Finished! | Ridgeside
We can’t wait to try this project–perfect for our cabin and saves $$$. Thanks!
Nice! Do you know about how much this cost to do?
Thanks, Rosa! I’d estimate about $60 for the pipe and fittings – we already had most of the necessary tools.
Awesome!! Great solution.
May I ask what color grout you used in your subway tiles? It looks so good!!
Thx 🙂
Thanks! I believe it was “delorean gray” – polyblend non-sanded grout #165.
That looks perfect for what I need-thanks for posting! How sturdy is it when sliding curtains back and forth on it?
What size copper did you use? Thank you.
Is the structure very stable/secure having only 2 mounts to the ceiling? I would imagine it would wobble a bit more as opposed to having 4 mounts to the ceiling. Also, did you use 3/4″ copper tubing?
Not sure if my question posted the first time. Is it pretty stable/rigid with only 2 mounts to the ceiling? As opposed to having 4.
Hi Christian,
Thanks for your question! We chose to use two mounts so that the shower curtains could wrap all the way around and meet each other while making it easy to open and close the curtains. It is very sturdy. With four mounts, you would have to use four separate curtain sections in order to cover the entire shower – or if you used two sections, they wouldn’t be able to open and close smoothly. Hope this is helpful!
I am doing this! Two questions: 1) what size did you make it? 2) How did you incorporate the ceiling shower head with the tub?
For the purpose of a shower rod, I would think that epoxy or thick CA glue might do the job rather than solder… just a thought…
Pingback: Industrial Farmhouse Bathroom Remodel - The Fit Foodie Mama